How to Partake in Janus Testnet: A Complete Guide
Welcome to the Janus Protocol testnet! Janus is designed to bring delta-neutral, automated arbitrage yield to the masses using ERC-4626 standard vaults. In this guide, we'll walk you through exactly how to get testnet tokens, connect your wallet, and start compounding yields entirely risk-free.
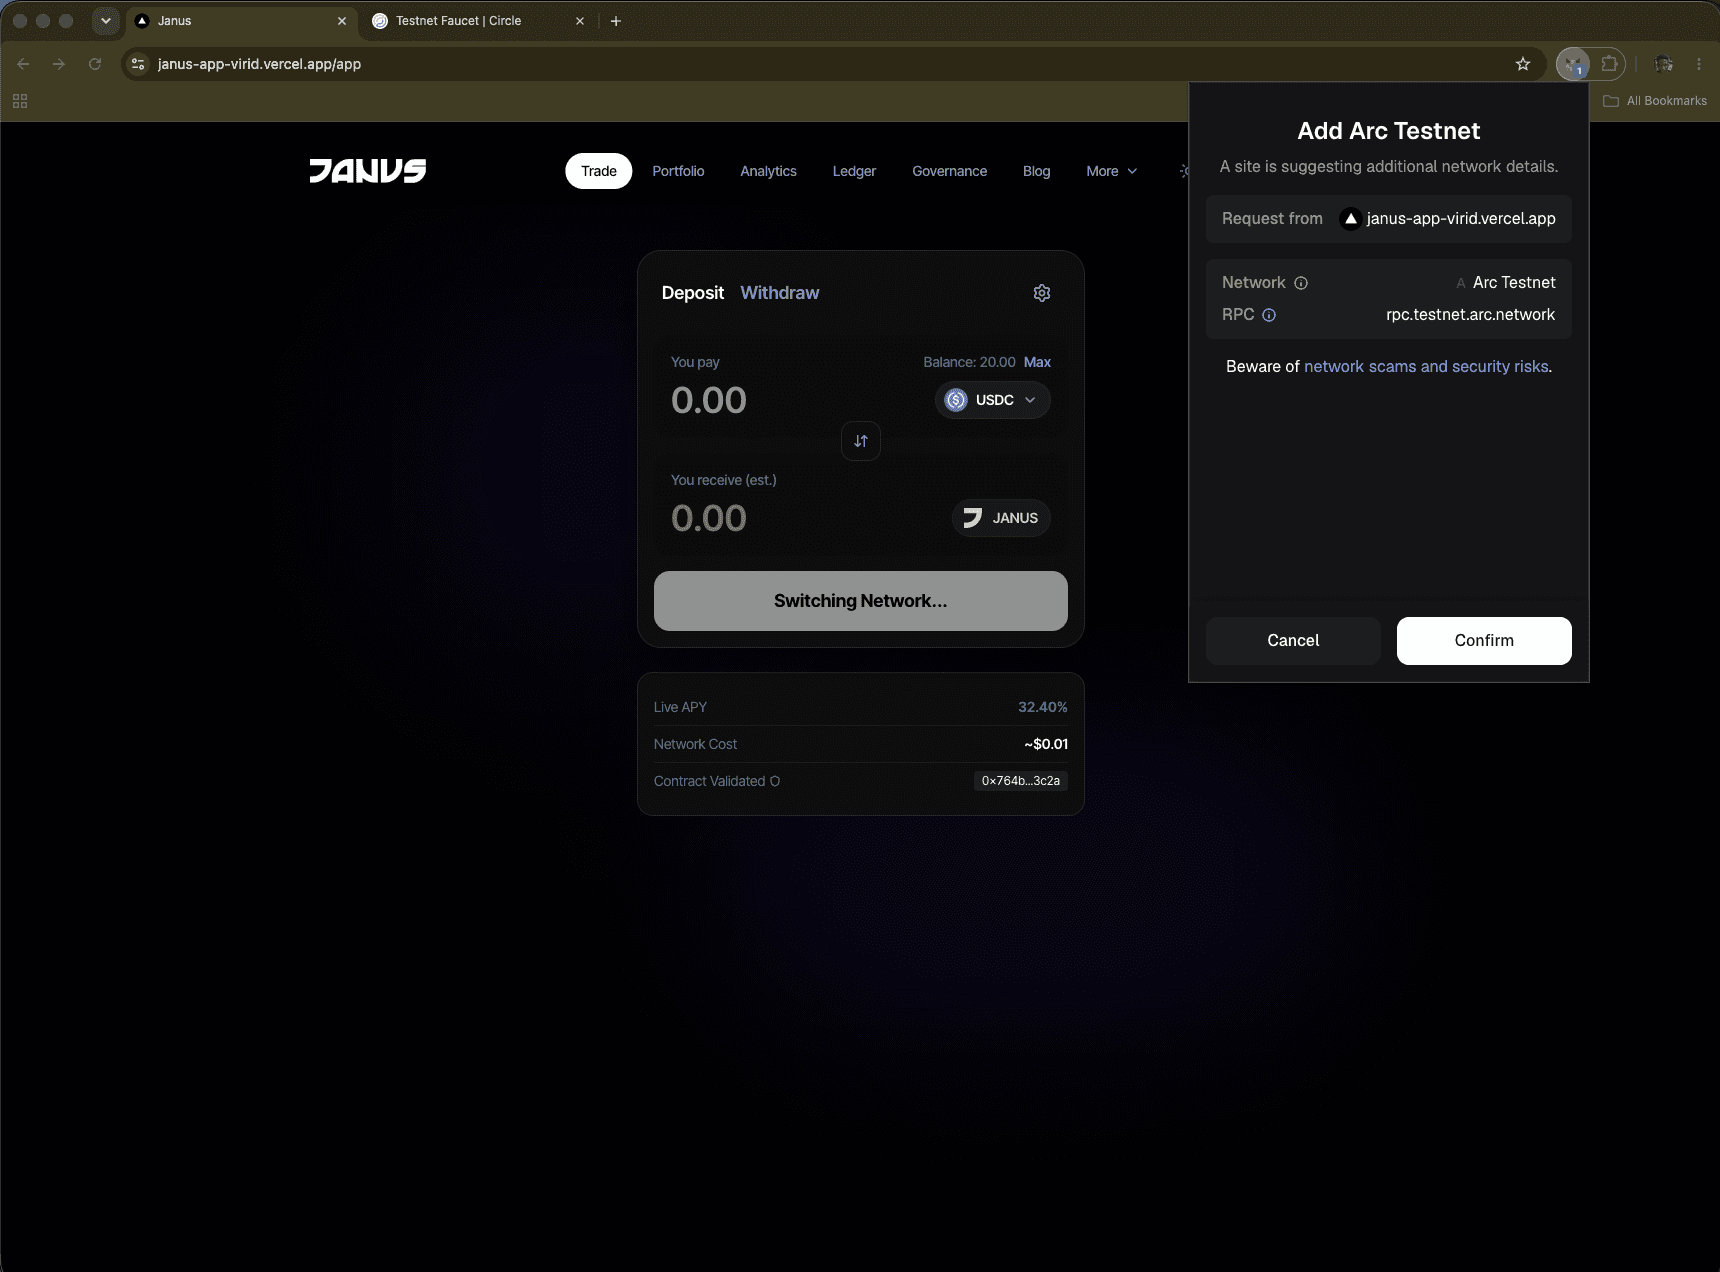
Step 1: Set Up Your Wallet for Arc Testnet
Before you can interact with Janus, you need an EVM-compatible wallet (like MetaMask or Rabby) connected to the Arc Testnet.
- Network Name: Arc Testnet
- RPC URL: https://rpc.testnet.arc.network
- Chain ID: 5042002
- Currency Symbol: ETH
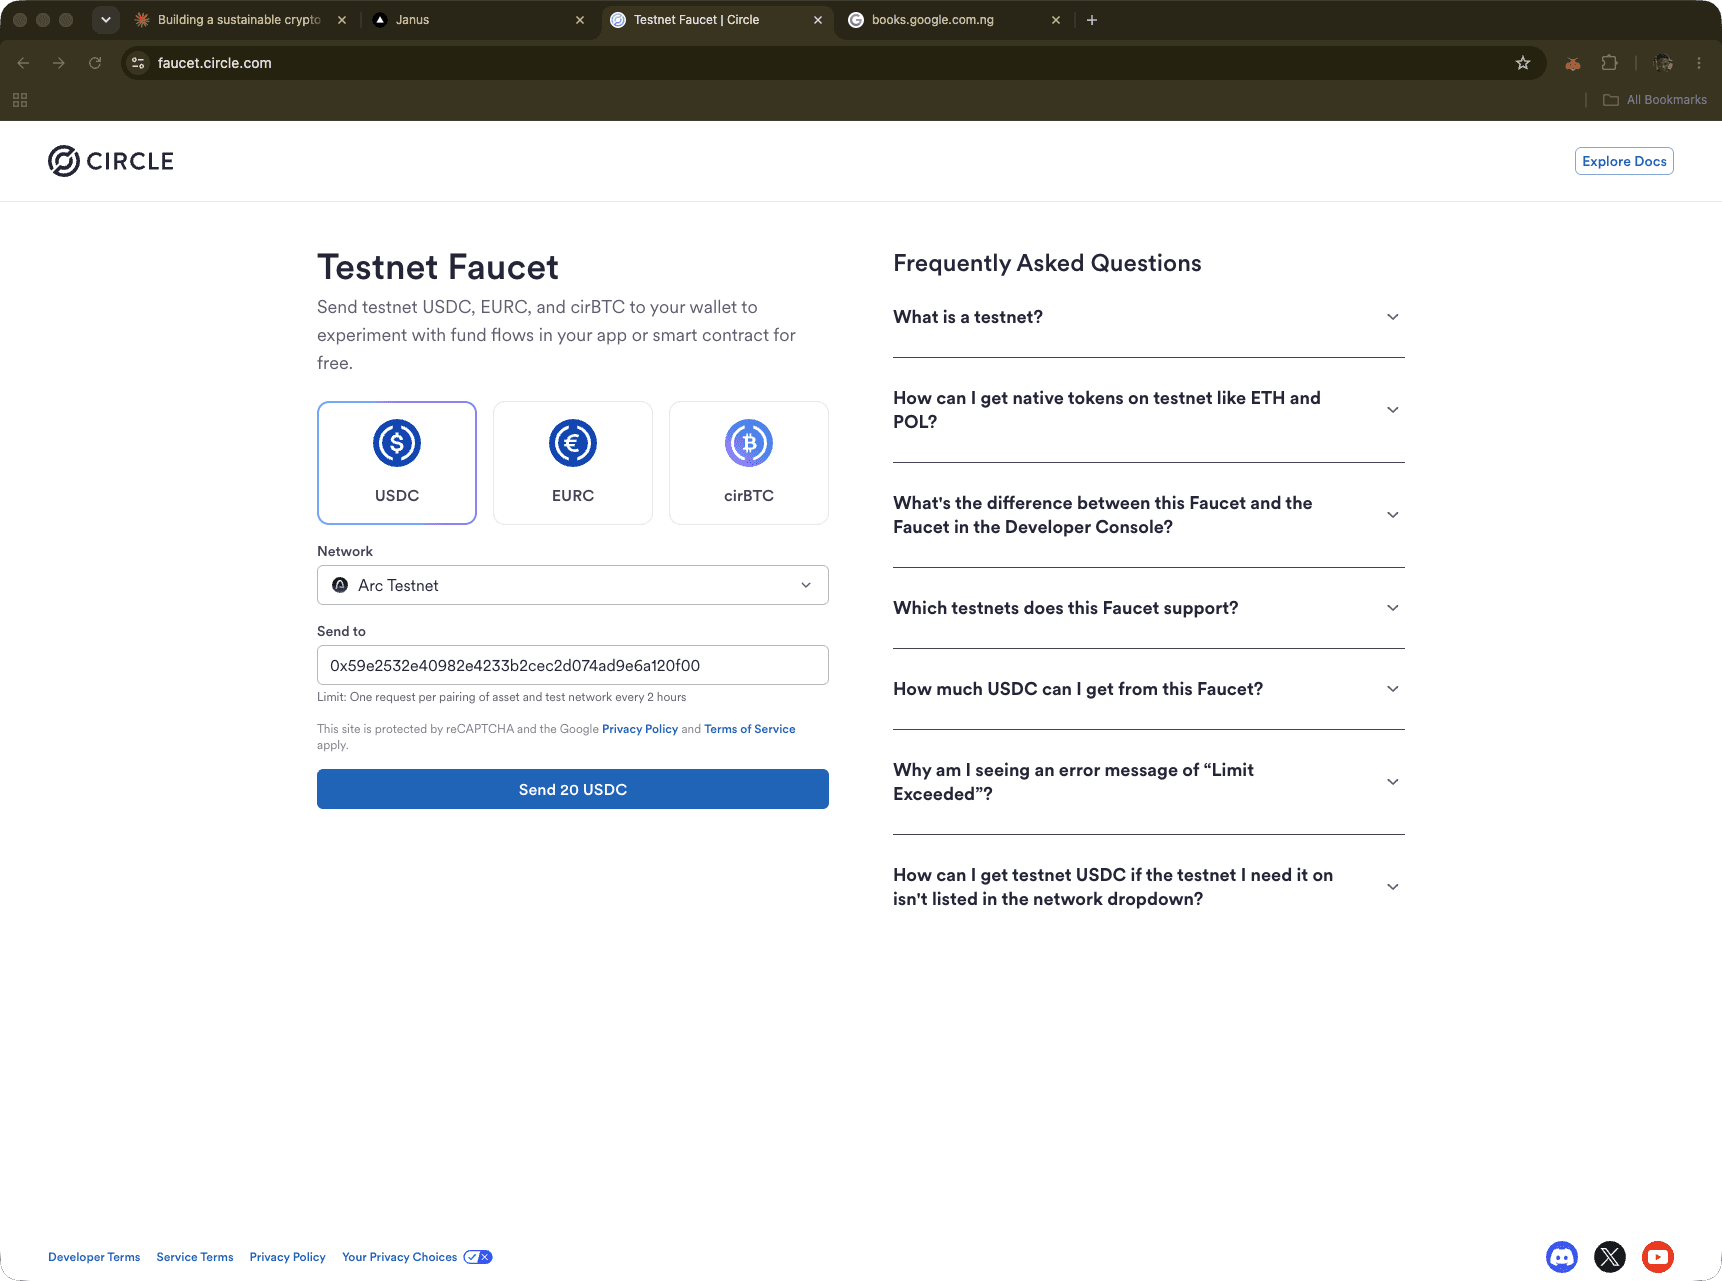
Step 2: Claim Testnet USDC/EURC
Janus vaults currently support USDC and EURC. Since we are on a testnet, you can mint these stablecoins for free using the official Circle Faucet.
Go to Circle FaucetSimply paste your wallet address, select the network, and hit "Send Me Tokens". Wait a few seconds for the transaction to confirm.
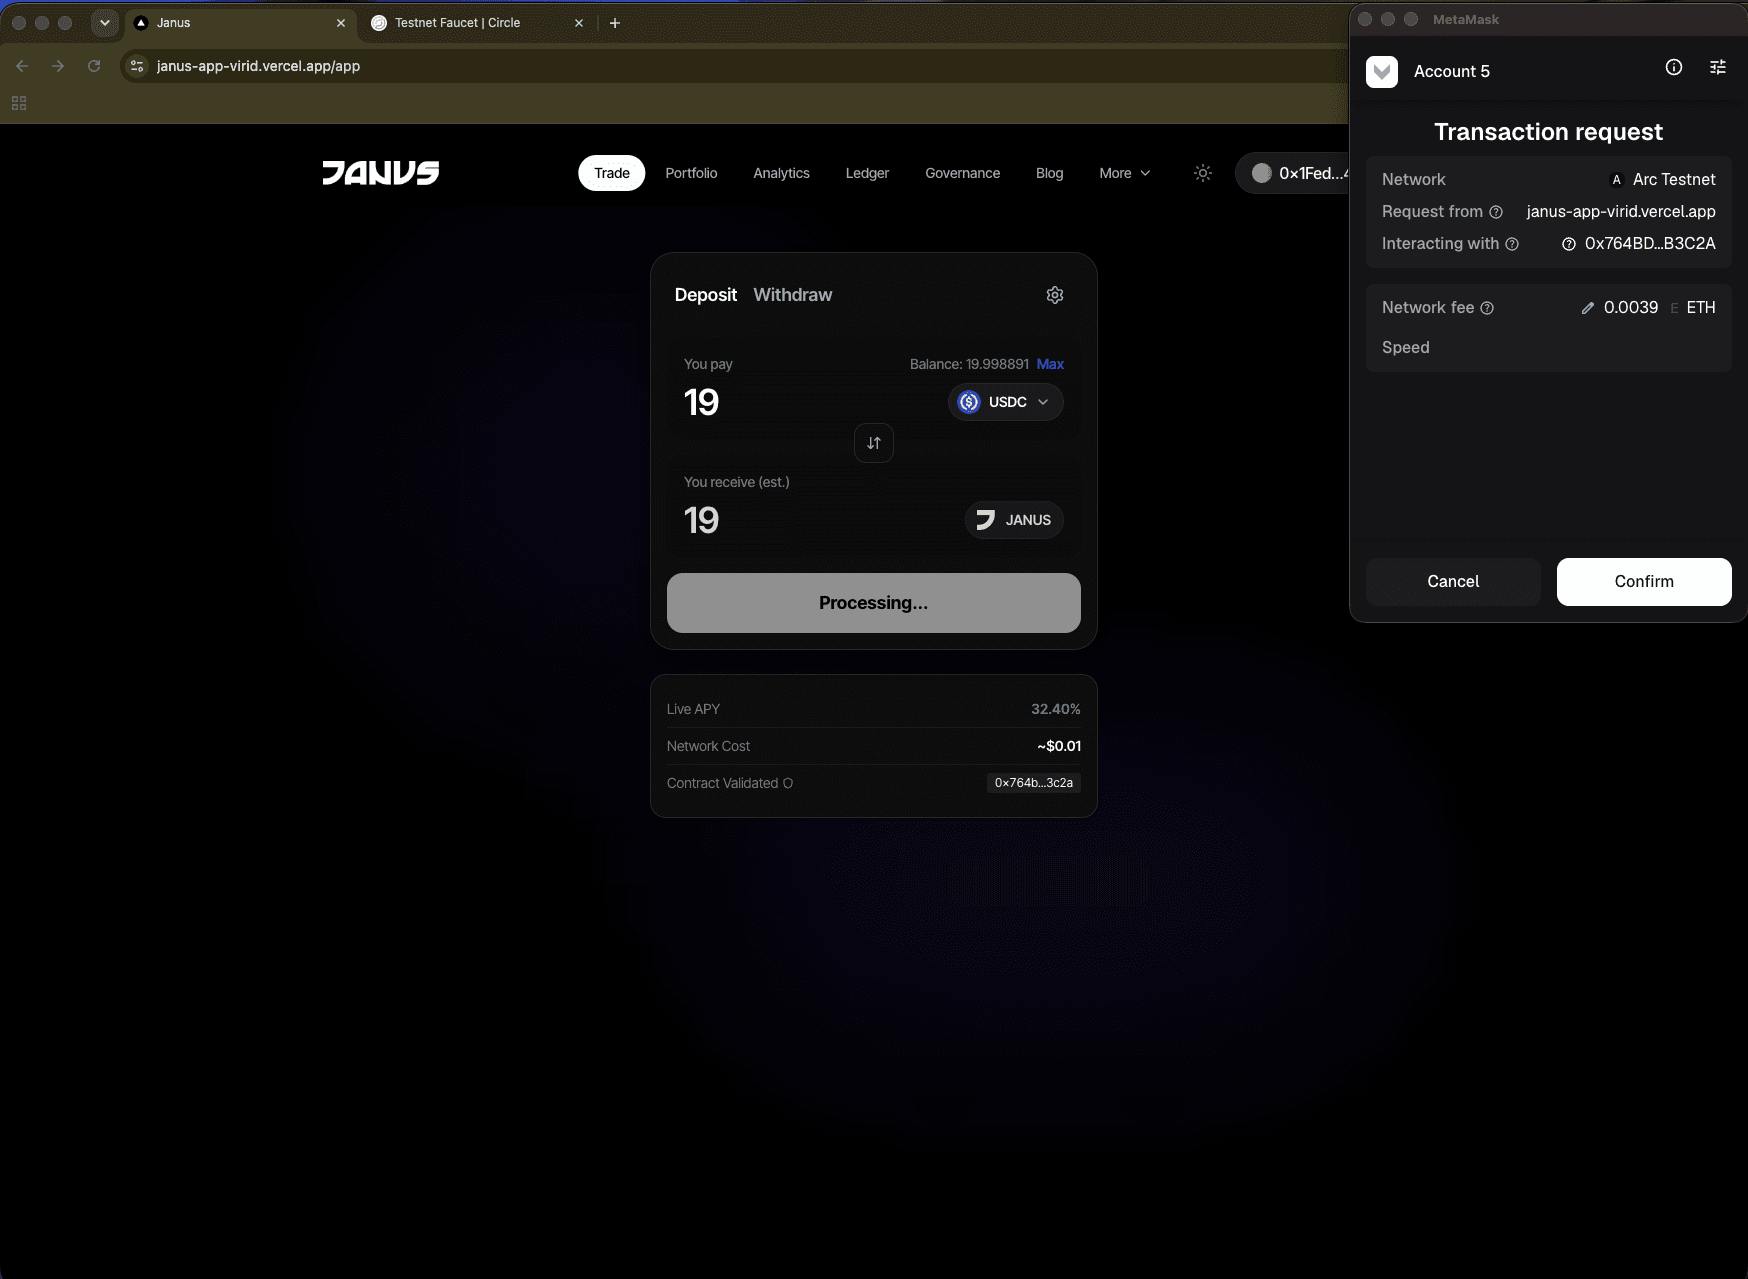
Step 3: Connect and Deposit
Now that your wallet is funded, head over to the Janus Trade application. Click the "Connect Wallet" button in the top right corner.
Once connected, navigate to the vault of your choice (e.g., USDC Delta-Neutral Vault). Enter the amount you wish to deposit, and click the Deposit button. You will be prompted to approve the spending cap in your wallet, followed by the actual deposit transaction.
Step 4: Watch Your Yield Grow
That's it! Once your stablecoins are in the vault, you will receive vault tokens (jUSDC/jEURC) representing your stake in the pool.
Behind the scenes, our automated keeper bots continuously scan major perpetual exchanges (Hyperliquid, KuCoin, MEXC, Binance, Bybit) for funding rate spreads. When a profitable spread is found, the protocol automatically executes a delta-neutral hedge to harvest the yield and compounds it directly back into your vault.
You can monitor your growing balance in real-time by visiting the Portfolio tab, or see the protocol's live trades on the Relayer Ledger.